INSTRUCTIONS AND TROUBLESHOOTING
Use the iPortal online request system to submit requests or report information to the International Services and Engagement Office (ISEO).
Log-In Instructions
Use your Single Sign-On (SSO) login information to log in to iportal.ucsd.edu.
Once logged in, you can:
- Click on the My Profile menu to view biographical, academic, contact and dependent information. You are required to verify information in the My Profile tab before submitting any iPortal requests.
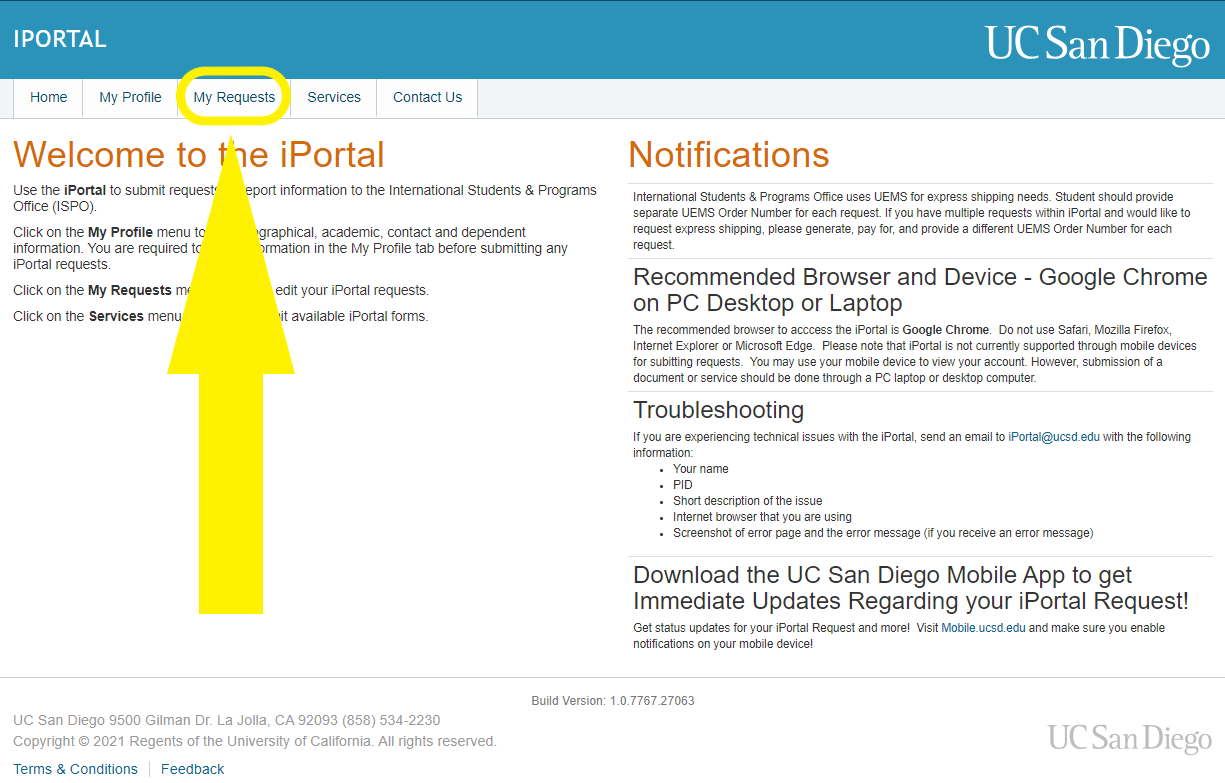
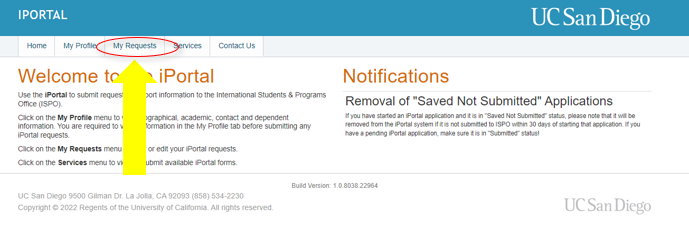
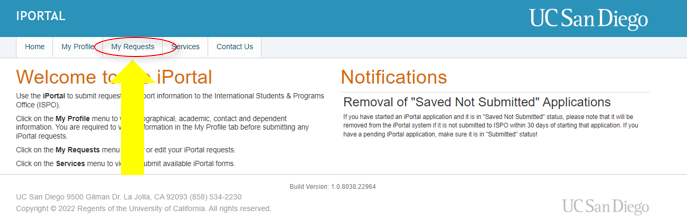
- Click on the My Requests menu to view or edit your iPortal requests.
- Click on the Services menu to view or submit available iPortal forms.
Accessing iPortal
Newly Admitted Students
The iPortal will be available for you to request your new I-20 or DS-2019 document(s) for Summer or Fall quarter starting in March of that year. You can log into iPortal using your UC San Diego Personal ID (PID).
Note for undergraduate students: You must Accept Your Offer of Admission in the Applicant Portal and create your First Time User Account on the Triton Checklist before accessing the iPortal.
Note for graduate students: Please wait at least 72 hours after accepting your offer of admission to set up your UCSD password/PID to enable you to access the iPortal.
Note for students who have graduated: Alumni should still have access to iPortal to access prior documents or submit requests. Log into iPortal with your PID (do not use email or username). If you have access issues, request your PID/PAC here.
Software and Browser Requirements
The recommended browser to access iPortal is Google Chrome. Do not use Safari, Mozilla Firefox, Internet Explorer or Microsoft Edge. Please note that iPortal is not currently supported through a Mobile Device for submitting requests. You may use a mobile device to view your account. However, submission of document and requests should be done through a Laptop or Desktop.
Accessing an Electronic Document in iPortal
STEP 1: Log into iPortal.
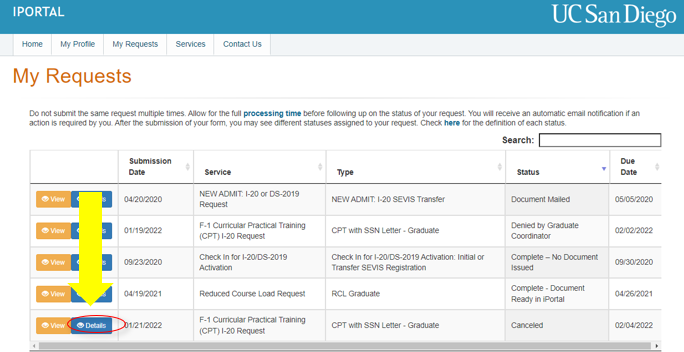
STEP 2: Go to the "My Requests" tab.
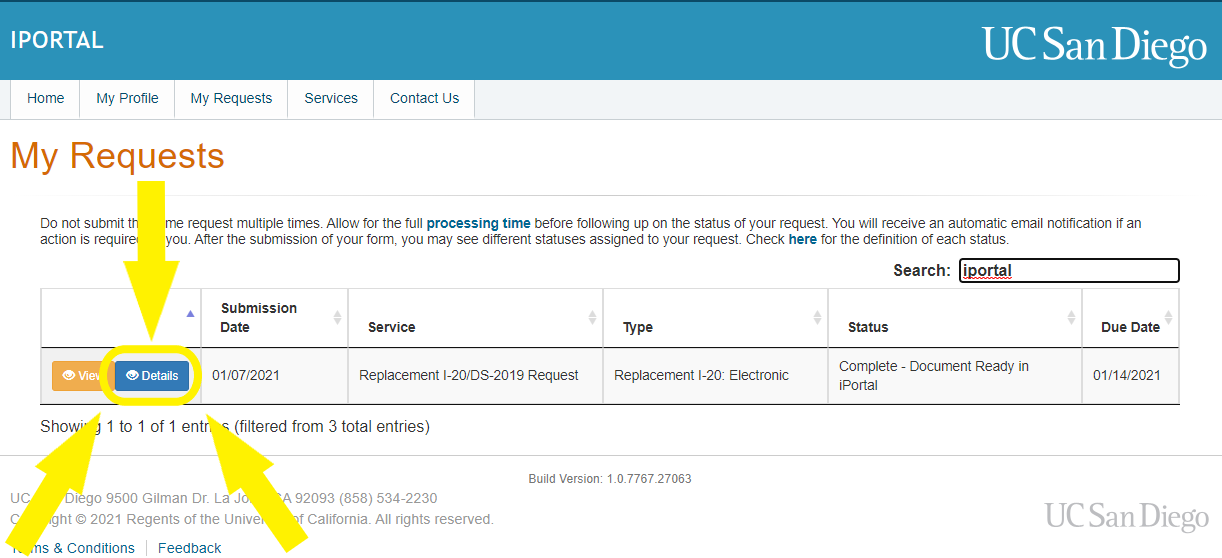
STEP 3: Click on the "Details" button next to your request.
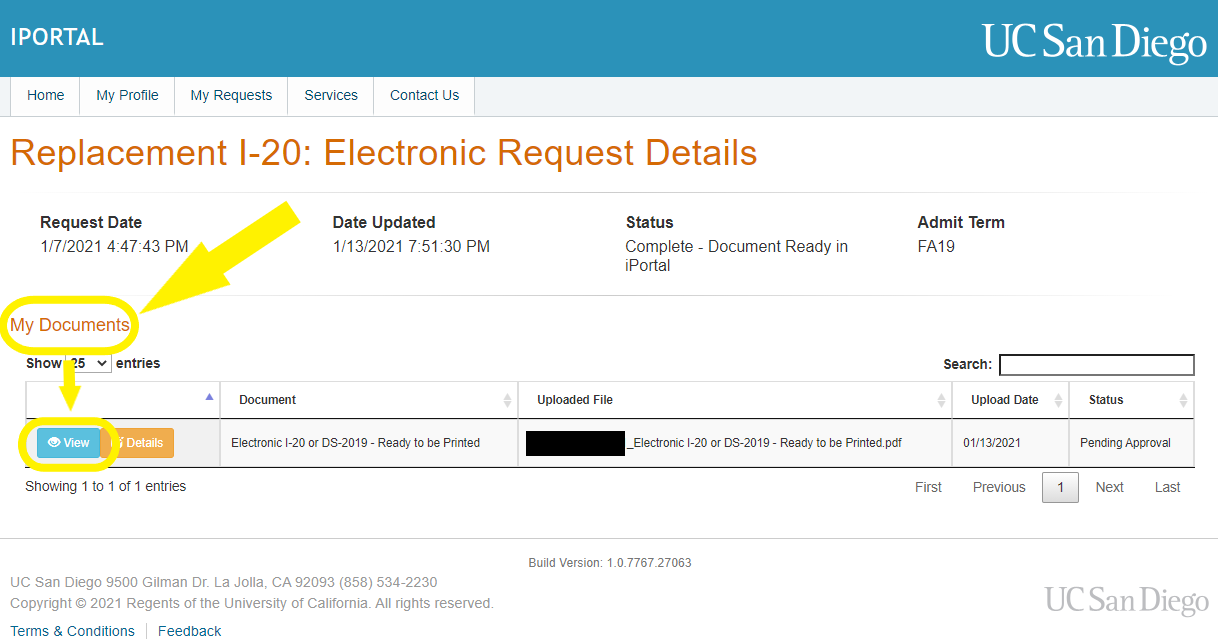
STEP 4: Scroll to the "My Documents" section and click on the "View" button next to the document you want to access.
When Accessing an Electronic I-20/DS-2019:
- Review your personal information, academic level, program dates and major.
- Confirm that any changes you requested are accurately reflected.
- Print, sign and date at the bottom of page 1.
- If you cannot print the I-20/DS-2019, submit a “Replacement I-20 Request” in iPortal.
Issues with Printing Electronic Documents
The signature on your document prints as a black box
- ISEO has tested printing electronic documents issued by our Advisors, and the documents printed without any issues using the current version of the standard Adobe Acrobat software.
- If you are experiencing this issue, try using different PDF readers (such as a different version or edition of the Adobe Acrobat, or some other 3rd party software) to open the document and print it from there.
- This Adobe Support page outlines several potential solutions to this issue.
- One of the solutions outlined on the Adobe Support page is to use the “Print As Image” option under the “Advanced” settings in the “Print” dialog window.
- In case the “Print As Image” option is not available directly in your “Print” dialog window, you can try to first save the PDF document as an image and then print that image.
- You can also try taking a screenshot of the document and print the screenshot.
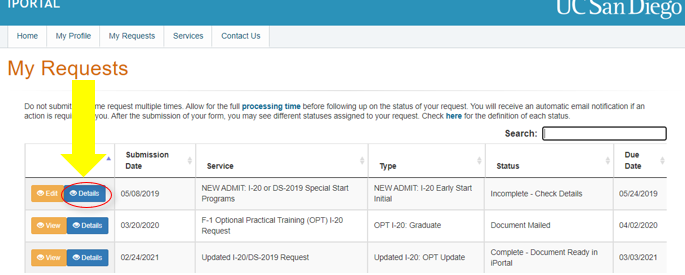
Resubmitting a Request in "Incomplete - Check Details" Status
STEP 1: Log into iPortal.
STEP 2: Go to the "My Requests" tab.
STEP 3: Click on the "Details" button next to your request that is in "Incomplete - Check Details" Status.
STEP 4: Review the message in "International Student Advisor Comments For Student" section.
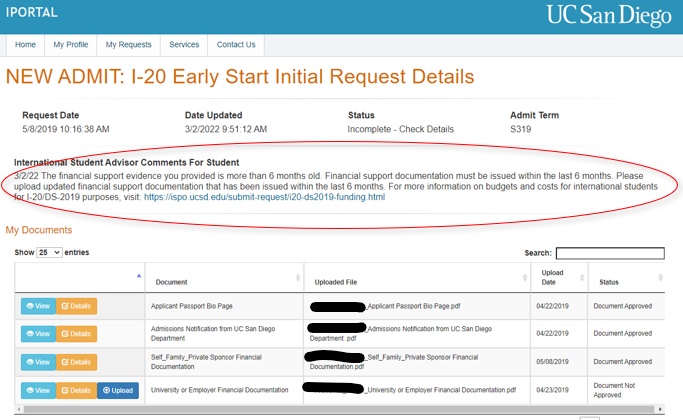
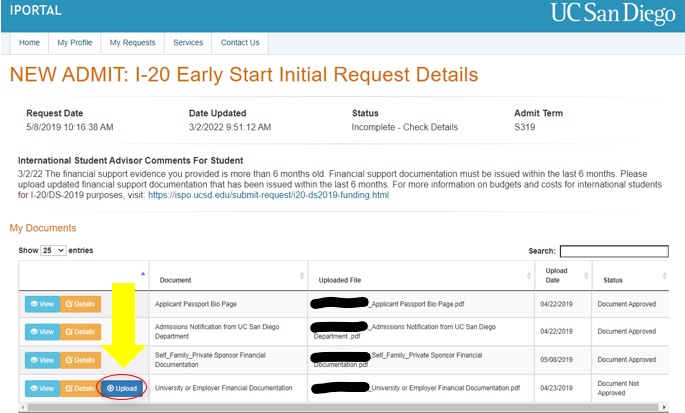
STEP 5 (if applicable): If a document is not approved, click on “Upload” next to that document to re-upload.
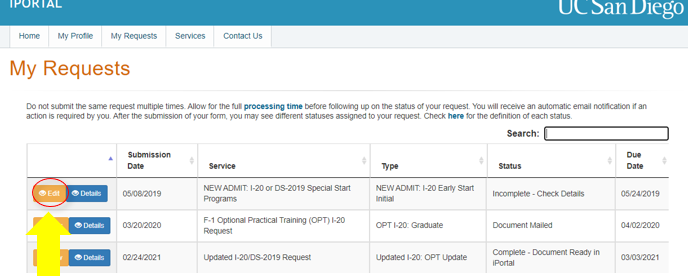
STEP 6 (if applicable): If you need to edit an answer in the request, go back to “My Requests” and click on the "Edit" button next to your request that is in "Incomplete - Check Details" Status and edit whatever information or document needs to be edited.
STEP 7: Complete all the steps in the request and click on the "Submit" button to resubmit your request. The status under “My Requests” should change to “Application Resubmitted.”
Reviewing Explanation for Requests in “Cancelled” or “Denied” Status
STEP 1: Log into iPortal.
STEP 2: Go to the "My Requests" tab.
STEP 3: Click on the "Details" button next to your request that is in "Cancelled" or "Denied" Status.
STEP 4: Review the message in "International Student Advisor Comments For Student" or “College/Department Approver Comments for Student” section.

Technical Support
Please try the following troubleshooting techniques to access iPortal and submit your request:
- Use a computer (instead of a mobile device) or a different computer than you tried previously
- Use Google Chrome (instead of a different internet browser)
- Try using an Incognito window in Chrome
- Clear your browser cache and refresh
- Try using a different WiFi network or ethernet connection
- When submitting requests, if applicable, ensure all required documents are uploaded (this will be indicated by a green checkmark next to each document requirement)
If you continue to experience technical issues with iPortal AFTER trying all solutions above, send an email to iportal@ucsd.edu with the following information:
- Your Name
- PID
- Short description of the issue
- Internet Browser that you are using
- Screenshots of error page and the error message (if you receive an error message)